It's still hard to wrap my brain around the fact that my little mini-me turned 4 this month. The girl is sassy, smart, sweet, sometimes sour and SO hilariously snarky. I know I am one lucky Mama, getting to spend my days enjoying her craziness.
Harper went back and forth for quite awhile on what her
theme would be. I don't know why I was so surprised that she had
MAJOR opinions about her party this year. First, she very expressly wanted to have a party for her "girlfriends" as she likes to say. Originally she was sticking to a
NO BOYS ALLOWED policy, but eventually decided that some of her
best dudes would be invited as well.
At Christmas she received an adorable singing
Mooshka doll from her Gramma. That was it! She fell in love and spent her Christmas gift cards buying more Mooshkas to add to her hoard...errr, I mean....
collection. She came up with the idea of having a Mooshka Tea Party...totally on her own! I was so proud of my little party planner - lol!
I immediately started pinning ideas like crazy. Mooshkas are relatively new to the scene, so there weren't a lot of ideas specific to the brand that were already out there. I still managed to find plenty of inspiration that would work easily with the theme. If you'd like to view my Mooshka board on Pinterest click {
HERE}.
I did a
TON of crafting and creating for this party. It was so fun having Harper's input on things. I loved that she would give me ideas because it made it that much more rewarding when I had project-success! A lot of the projects I worked on doubled as birthday gifts, and many of the decorations will be going in her room now that the party is over.
My plan was to create a lot of the decorations using paper crafting materials
because the Mooshkas are paper dolls that came to life! Plus, Harper was
able to help with a lot of these projects as well, which made it even
more special and fun.
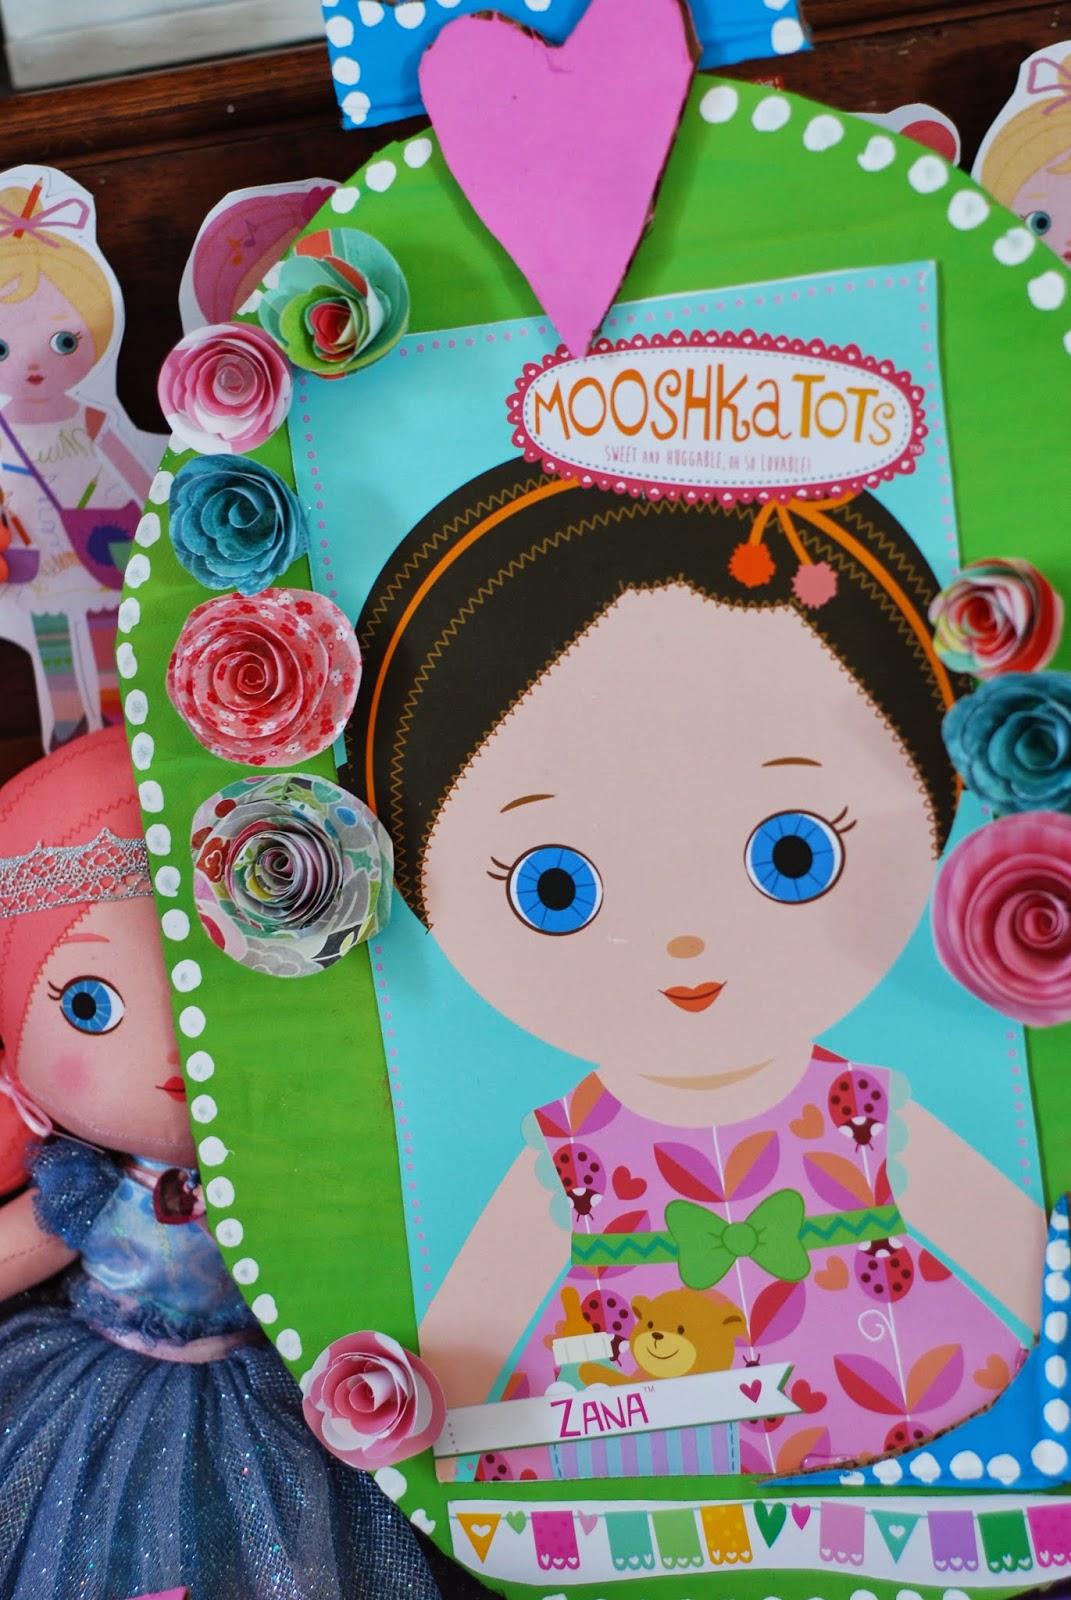
One of the first things I did was create some wall art using the
ADORABLE boxes the Mooshka dolls come packaged in. I cut picture frame shapes out of cardboard and then we painted them in various colors. I added the portraits of the dolls to each painted piece, and then embellished with various scraps (also cut from the boxes), paper rosettes and cardboard hearts. We added ribbon to the backs so they were easy to hang. One of my favorite things about this project was that it cost me absolutely nothing to make because I already had cardboard, paint and ribbon around the house. They are going to look adorable hanging in Harper's room too!
We hung one on the front door to welcome our guests and then I let the kiddos add some of their own decorations on the day of the party. They had SO much fun taping up all the paper-heart-chains we had cut out around Valentine's Day. Another bonus: it kept their little hands busy and their minds occupied for about a half an hour while I was finishing things up.
I also used cut cardboard to create the birthday banners. Each piece was cut, painted and then attached to ribbon using hot glue. The lettering was part of a printable package my amazing friend Gretchen, of
Three Little Monkeys Studio, created for me! I just printed them out on card stock at our local printer, punched each one out and added them to the banner pieces. We strung these up in the window during the party, but it was impossible to get a good picture of them there with the back light :)
Gretchen also created a couple of super fun 5x7 signs for us to use as party decor. I stuck them in some frames we already had.
So cute...they'll be going in Harper's room post-party as well!
I even dug my sewing machine out to make a few things! I am not skilled in this area, so let me just say that there was a lot of cursing, muttering and head shaking involved with the sewing projects. In the end I was really pleased with how things turned out. I love homemade gifts and decor, so this was a fun challenge for me. One project was the tablecloth. I used a thrift store crib skirt as the base. Then I added a few more layers and some fun ruffles to make it the perfect length and style for my Mooshka Girl!
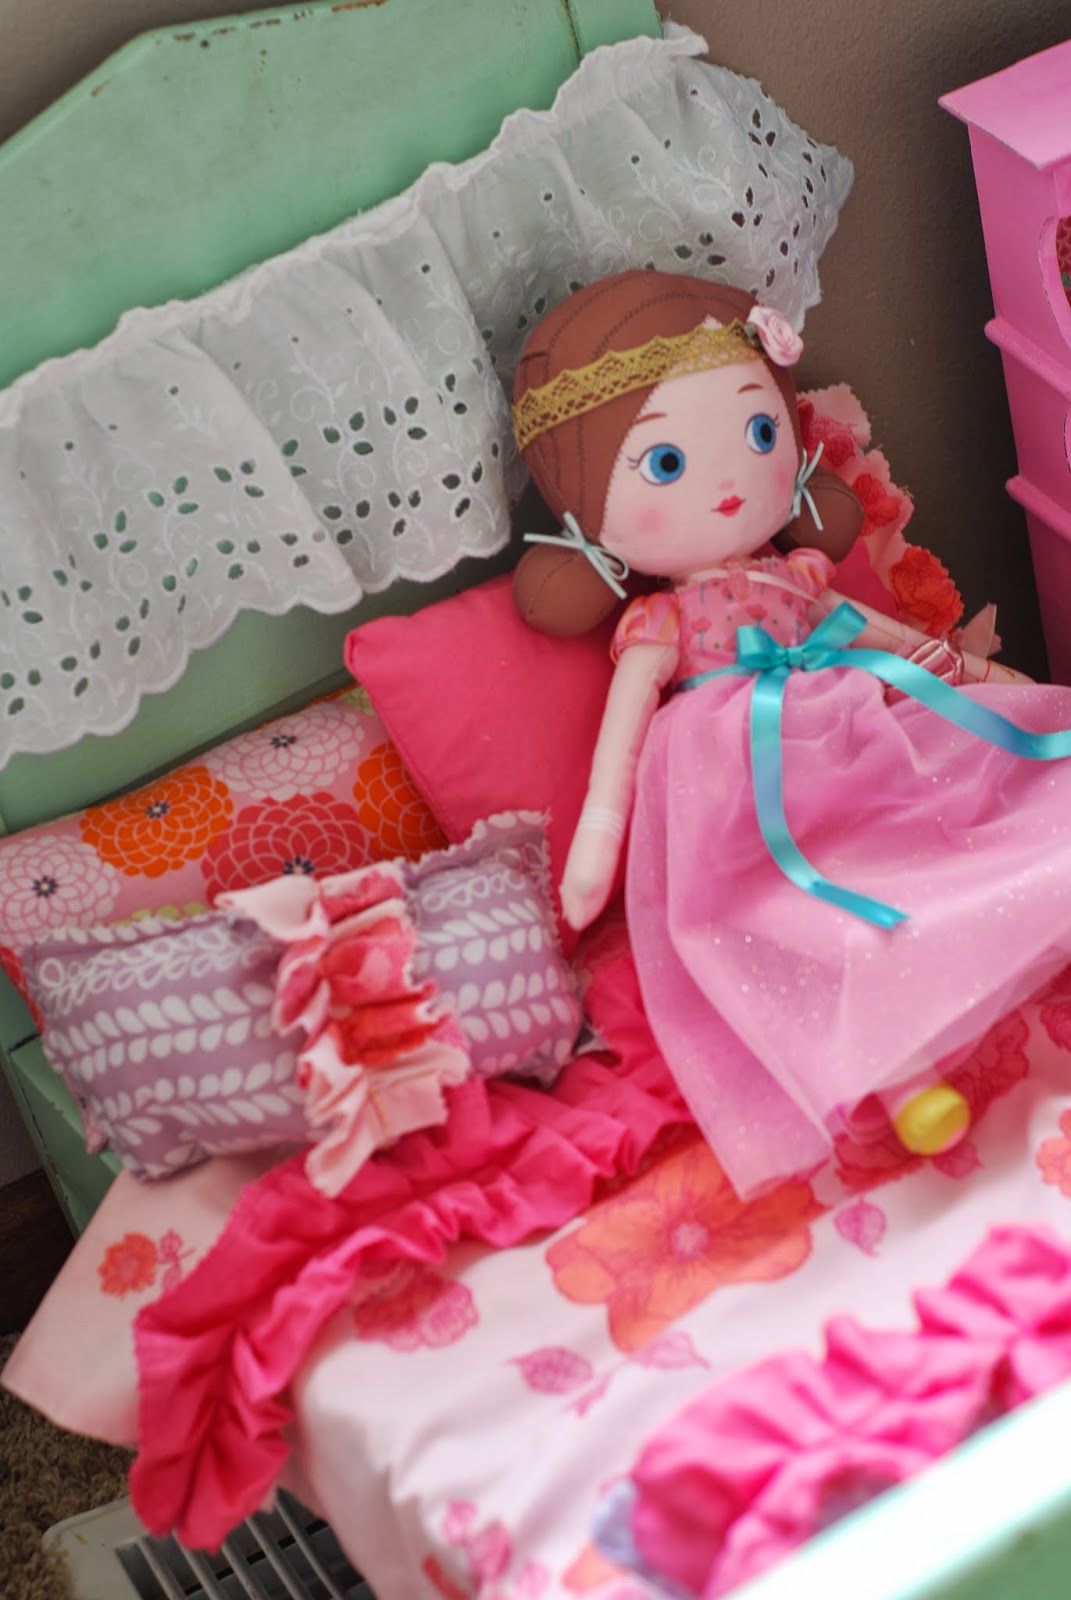
I also used some thrifted pillow cases and scraps to create a doll sized bedding set. Mooshka approved!
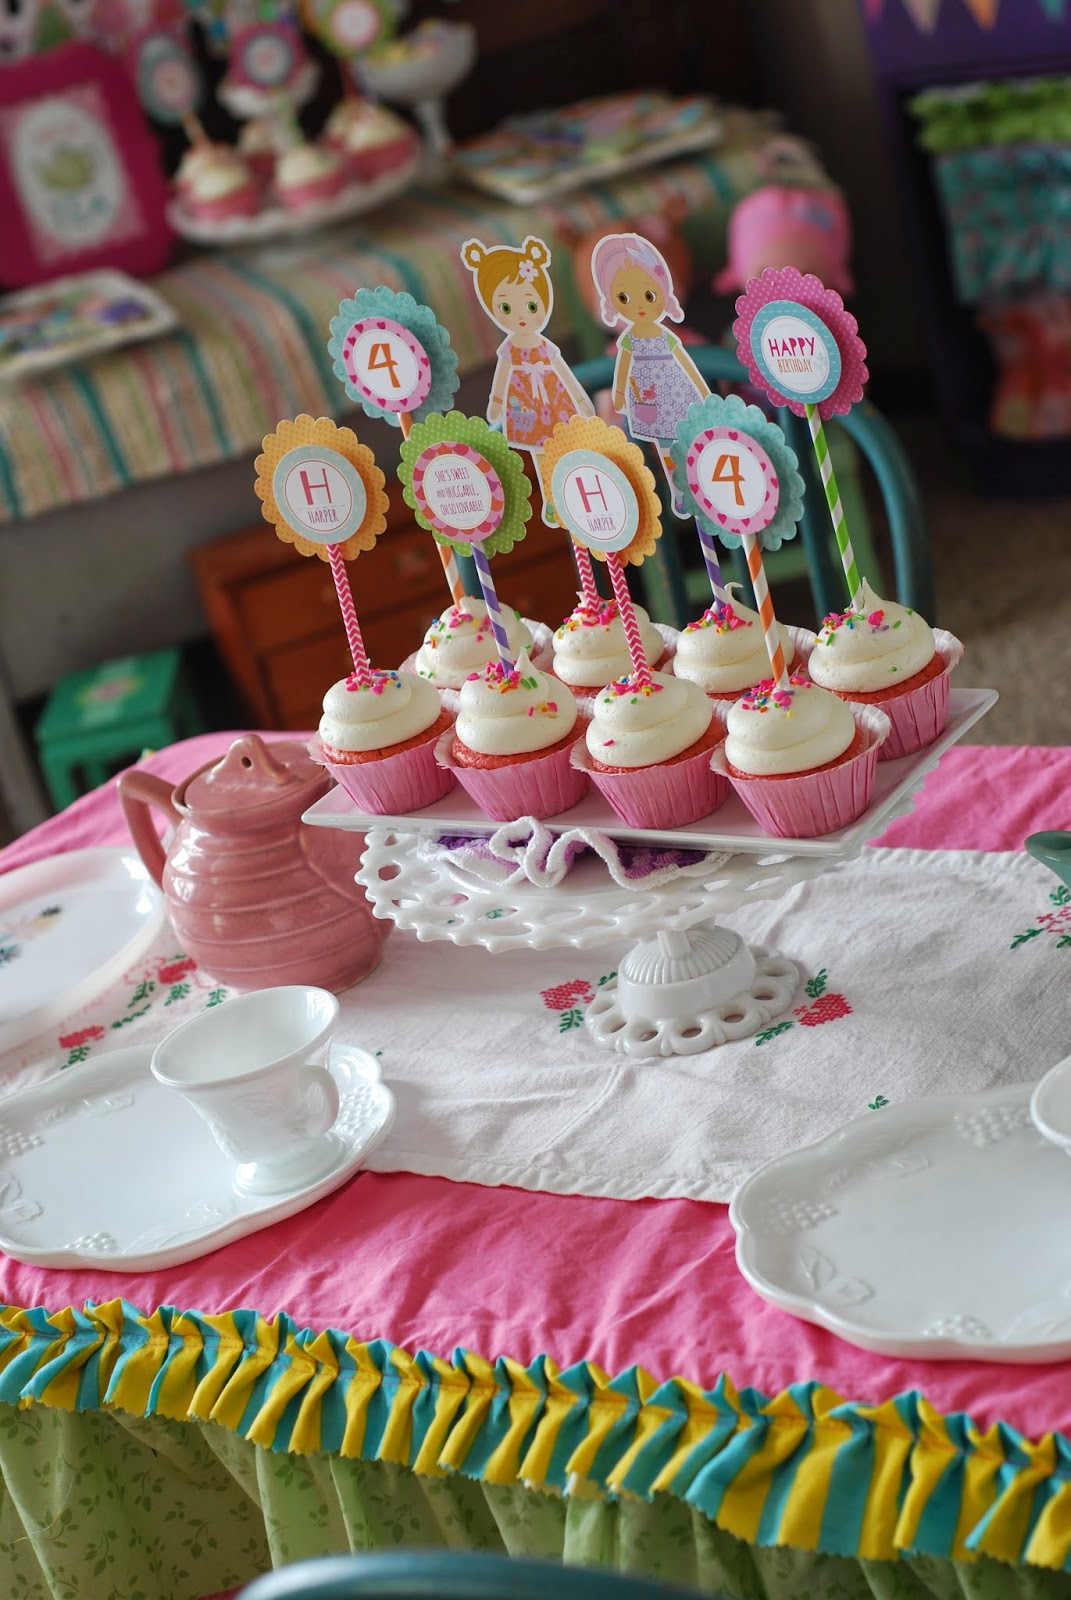
I always pull a lot of decorations from around the house when I'm setting up our parties. It's fun to work things in that we already have. I have a small hoard of milk glass serving pieces that were perfect for the Tea Party.
I also have a collection of vintage teapots, cups and saucers. They were used throughout the party as well.
Harper has had this adorable yarn wrapped wreath hanging in her room for a couple of years now. I plopped a Mooshka Tot in the center and it was party-ready!
We filled the living room with Harper's doll toys and furniture. This way all of her guests, who were invited to bring their favorite doll along, had a sweet play area all ready to go.
Another thrift store find was the sweet Tea Party Hutch! I found it a week before her birthday and set immediately to work refinishing it! She wanted it to be "nice and purpley" so that was my starting point. After several coats of purple paint, I sanded down the edges and added a coat of stain to the entire piece. Then I added additional details using decoupage. I sewed a small, ruffly curtain to replace the doors on the bottom, added some teacup hooks and called it good. Harper
LOVES-LOVES-LOVES it!
I incorporated the Mooshka packaging several different ways throughout the party. Each doll comes with her own set of paper Mooshka dolls. We had saved
ALL of these :) I used one set of the Mooshka Tots paper dolls to create a decorative canvas for Harper's room. I first painted the canvas blue and then created a scene using various shapes cutout of scrapbook paper, then added the paper dolls and decoupaged the entire thing.
I also took the paper dolls to a local print shop and made several color copies of them onto cardstock paper. We then cut them out and linked them together to make Mooshka Doll garlands!
I also used some of them uncut, as covers on homemade coloring books we created as favors for the party guests. The Mooshka website has a lot of
FREE downloads that are super cute and fun {
HERE}. We printed and made copies of each of the coloring pages, and then bound them together with ribbon.
Even more of the paper doll cardstock copies were used to make cupcake toppers. I just cut them out and hot glued them to colorful paper straws!
We had a small favor with bracelets, crowns, star-shaped suckers, the coloring books and lollipop erasers for Harper's guests. We like to use the sweet-themed erasers as pretend treats for the Mooshkas when they're having their own tea parties.
I also created some Mooshka Doll Cake Pops, using the paper dolls as the body on the pop sticks.
I chose to set the mini dessert buffet up where the kiddos could reach
it. Not something I would usually do - lol! But I wanted them to feel
like it really was their Tea Party, and let them help themselves. Risky
to a point, with all those sweets easy to grab...but they loved it!
My
famous Strawberry Fluff Cupcakes were specifically requested by the Birthday Girl, they're her absolute FAVE!
Now, I need to talk about the ridiculously
GORGEOUS Cookie Art created by my good friend Emily, of
Emi's Treats! Seriously. These cookies were
BEYOND amazing. I had a few ideas for her, but basically asked her to work her magic...which she
clearly did. They definitely stole the show :)
I had a lot of fun and crafty ideas for party games and activities, but in the end, chose to keep things simple. I found some cute kits with heart glasses and stickers that the girls decorated. I picked them up on major clearance after Valentine's Day...perfect and easy!
As always, this party was a total labor of LOVE! It truly was a magical afternoon full of fun and sweetness. Harper has thanked me every day since her party. In her words, "Mom I loved my Mooshka party. Thank you for making it so beautiful...you are my best Mom EVER!"
THAT is why I do this! It's so rewarding and incredibly heart warming to be able to create these memories for my most special girl.
~Audrey


 I had a lot of fun and crafty ideas for party games and activities, but in the end, chose to keep things simple. I found some cute kits with heart glasses and stickers that the girls decorated. I picked them up on major clearance after Valentine's Day...perfect and easy!


